
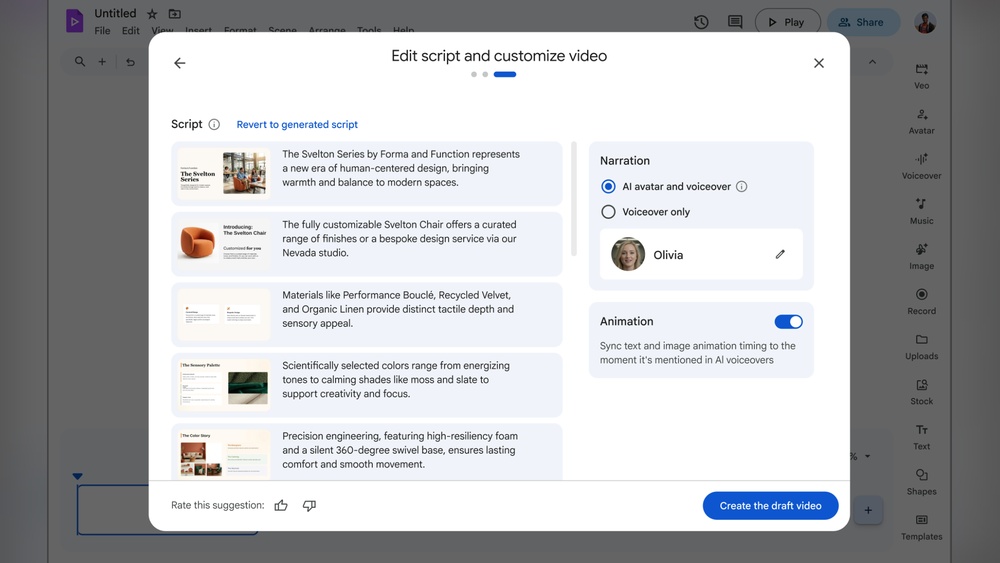
How to Add Custom Voiceover to Short Form Videos Easily
Short form videos are everywhere today—on TikTok, Instagram Reels, YouTube Shorts, and more. Whether you’re a business owner, a content creator, or just someone who loves to share moments, short videos are a powerful tool. But to stand out, you need more than just visuals. Adding your custom voiceover can make your message clearer, your brand stronger, and your content more memorable.
Yet, many people feel unsure about how to add their own voice to short videos. Which tools are best? What are the steps? How do you avoid common mistakes? This guide walks you through everything you need to know about adding custom voiceover to short form videos. You’ll get practical advice, real examples, and insider tips—so your next video gets noticed and remembered.
Why Custom Voiceover Matters In Short Videos
Short videos are quick, but they’re not always easy to make impactful. A custom voiceover changes everything:
- It delivers your message directly.
- It adds personality and emotion.
- It makes your content unique and authentic.
According to a 2026 survey by Social Media Today, videos with personalized voiceovers increased viewer retention by 34% compared to silent or generic videos. This means more people watch your content all the way through, which is crucial for platforms that reward engagement.
In branding, a voiceover lets you speak to your audience, not just show them visuals. People remember voices, especially when they feel genuine. For educational or explainer videos, a voiceover clarifies instructions and reduces confusion.
But there’s a catch: poor voiceovers can hurt your video. Bad audio, unclear speech, or rushed editing distract viewers. So, learning how to do it right is important.
Choosing The Right Tools For Voiceover
Before you record your voiceover, you need the right tools. These fall into three main groups: recording devices, editing software, and video platforms.
Recording Devices
The device you use affects your audio quality. Here are some options, from basic to advanced:
- Smartphone Microphone: Most new phones record clear audio. It’s quick and easy, but background noise can be a problem.
- USB Microphone: Devices like the Blue Yeti or Audio-Technica ATR2100 offer much better quality. They plug into your computer and are ideal for home recording.
- Lavalier Mic: Small, clip-on mics (like the Rode SmartLav+) are great for recording on the go.
- Professional Studio Mic: If you want the best, studio mics like the Shure SM7B produce crisp, rich sound, but they cost more and need extra equipment.
Editing Software
You need software to record and edit your voiceover. Here’s a comparison of popular options:
| Software | Price | Ease of Use | Features |
|---|---|---|---|
| Audacity | Free | Beginner-friendly | Basic editing, noise removal |
| Adobe Audition | $20/mo | Intermediate | Advanced editing, effects |
| GarageBand (Mac) | Free | Easy | Multi-track, music integration |
| DaVinci Resolve | Free/$295 | Intermediate | Video + audio editing |
For most beginners, Audacity is perfect. It’s free, works on Windows and Mac, and lets you easily cut, trim, and clean up your audio.
Video Platforms
You also need a platform to add your voiceover to the video. Some apps let you do everything on your phone. Others need desktop software.
- TikTok: Lets you record and add voiceover directly in the app.
- Instagram Reels: Offers simple voiceover tools.
- CapCut: Free app with advanced editing—great for both video and audio.
- Adobe Premiere Pro: Professional desktop software for detailed editing.
- InShot: Mobile app that’s easy for beginners.
If you want to reach more people, pick a tool that works with your main platform. For example, CapCut integrates well with TikTok and Instagram.
Planning Your Voiceover Script
A good voiceover starts with a clear script. Even short videos need a plan. Your script should match the visuals and deliver your message fast—most short videos are under 60 seconds.
How To Write A Script
Keep these tips in mind:
- Know Your Purpose: Are you educating, entertaining, or promoting? Your tone and words should match.
- Use Simple Language: Avoid complex words. Speak as you would to a friend.
- Match the Pace: Short videos need quick, clear sentences. Practice reading your script out loud.
- Add Personality: Use your own expressions or slang if it fits your brand.
- Include a Call to Action: End with something viewers can do—like follow, share, or visit a site.
Here’s an example for a 30-second cooking video:
“Today, I’ll show you how to make a quick breakfast sandwich. Grab your bread, egg, and cheese. First, toast the bread. Next, cook the egg—just two minutes. Stack the cheese, egg, and bread, and you’re done! Try it for your next busy morning.
”
Non-obvious Insights
- Script for Silence: Sometimes, you need to pause in your voiceover so viewers focus on visuals. Mark these pauses in your script.
- Practice with Visuals: Run through your script while watching the video. This helps you catch timing issues before recording.
Recording Your Custom Voiceover
Now that you have your script and tools, it’s time to record. Follow these steps for best results:
- Find a Quiet Place: Background noise ruins voiceovers. Choose a small room with soft surfaces (like carpets or curtains).
- Set Up Your Mic: Place the mic about 6–8 inches from your mouth. Avoid touching the mic during recording.
- Warm Up Your Voice: Speak clearly. Drink water, avoid dairy, and do a few vocal exercises.
- Record in Sections: Record your script in short parts. If you make a mistake, it’s easier to fix.
- Save Multiple Takes: Don’t settle for the first try. Record two or three takes and pick the best.
Tips For Better Audio
- Use Pop Filters: These stop harsh “P” and “B” sounds. Most mics have them built in, or you can buy cheap ones.
- Listen with Headphones: Monitor your recording with headphones to catch problems early.
- Avoid Monotone: Change your tone and speed. This keeps viewers interested.
Common Beginner Mistakes
- Speaking Too Fast: Short videos don’t mean fast speech. Slow down so people understand you.
- Ignoring Background Noises: Cars, fans, or pets can distract viewers. Always check your space before recording.
- Forgetting to Check Levels: Too loud or too soft? Use software to watch your volume.

Credit: www.devoteam.com
Editing Your Voiceover
Editing is where your voiceover becomes polished and professional. Even small changes can make a big difference.
Basic Editing Steps
- Trim Mistakes: Cut out errors, extra pauses, or filler words.
- Adjust Volume: Make sure your voice is clear and consistent. Most software has an “amplify” or “normalize” tool.
- Clean Up Noise: Use noise reduction features to remove background sounds.
- Add Effects (Optional): For some videos, light echo or reverb adds emotion. But don’t overdo it.
- Export in Right Format: Use MP3 or WAV for most platforms.
Advanced Techniques
- Layering: Add background music underneath your voice. Keep the music soft—voice should always be louder.
- Synchronizing: Make sure your voice matches the action in the video. If your timing is off, viewers get confused.
- Crossfades: Smooth transitions between sections help avoid abrupt cuts.
Example Workflow
Let’s say you’re editing a short travel video. You recorded your script in three parts. In Audacity, you:
- Import each audio section.
- Cut mistakes and tighten timing.
- Apply noise removal.
- Add light background music.
- Export as MP3.
Then, you import this audio into your video editing app (like CapCut or Premiere Pro) and sync it with your visuals.
Adding Voiceover To Your Short Video
Once your voiceover is ready, you need to add it to your video. The process depends on your software, but here’s a general guide:
- Import Video and Audio: Open your video editing app. Import your video and the edited voiceover file.
- Drag to Timeline: Place the video and audio tracks on the timeline.
- Sync Up: Move the audio to match key visual moments. Zoom in for precise alignment.
- Trim as Needed: If your voiceover is longer than the video, cut the end. If it’s shorter, repeat key points or add background music.
- Preview: Watch the whole video to check timing, volume, and clarity.
- Export: Save your video in the right format for your platform (MP4 for most apps).
Comparison Table: Mobile Vs Desktop Editing
| Editing Method | Ease | Features | Best For |
|---|---|---|---|
| Mobile App (CapCut, InShot) | Very easy | Basic trim, sync, effects | Quick edits, beginners |
| Desktop App (Premiere Pro, DaVinci Resolve) | Moderate | Advanced audio/video tools | Detailed edits, pros |
If you’re new, start with mobile apps. They offer simple drag-and-drop features and are usually free. For more control or longer videos, desktop apps are better.
Enhancing Voiceover With Music And Effects
Adding background music or effects can make your voiceover more engaging. But it’s easy to make mistakes. Here’s how to do it right:
Choosing Background Music
Pick music that matches your video’s mood. For short form videos, upbeat or light tracks work well. Avoid music with lyrics—it competes with your voice.
- Royalty-free sites: Use music from places like YouTube Audio Library or Free Music Archive.
- Volume control: Keep music volume at 20–30% of your voiceover. Viewers should always hear your voice first.
Sound Effects
Small effects (like a “ding” or “whoosh”) can highlight key moments. Use them sparingly. Too many effects distract from your message.
Mixing Tips
- Test on Different Devices: Play your video on a phone, tablet, and computer. Make sure your voice is clear everywhere.
- Fade In/Out: Fade music at the start and end for smooth transitions.
- Check Platform Rules: Some platforms mute videos with copyrighted music. Always use legal tracks.
Example: Adding Music In Capcut
- Tap “Audio” and choose “Music.”
- Pick a track and add it to your timeline.
- Lower the volume until your voice stands out.
- Add fade-in and fade-out for a professional touch.
Exporting And Publishing Your Video
After your video is ready, you need to export it in the right format and share it. Different platforms have their own requirements.
Export Settings
- Resolution: Use 1080×1920 (vertical) for TikTok and Instagram Reels.
- Format: MP4 is standard.
- Bitrate: 5–10 Mbps is enough for short videos.
Uploading To Platforms
- TikTok: Open the app, tap “Upload,” select your video, and add captions or hashtags.
- Instagram Reels: Tap the “+” button, pick your video, and share.
- YouTube Shorts: Go to “Create,” upload your video, and fill in details.
Optimizing For Engagement
- Add Captions: Many viewers watch videos without sound. Captions boost engagement.
- Choose a Good Thumbnail: Use a clear, bright image as your thumbnail.
- Post at the Right Time: Research shows videos posted between 6–9 pm get more views.
Example Data: Best Posting Times
A 2026 study by Later.com found:
- TikTok: Tuesday and Thursday, 7 pm–10 pm
- Instagram Reels: Monday and Wednesday, 6 pm–8 pm
- YouTube Shorts: Friday, 12 pm–3 pm
Timing matters. Test different times and track your results.
Insider Tips For Professional Voiceovers
Even if you’re new, you can make your voiceover sound professional with a few tricks:
- Smile While Speaking: Smiling changes your tone and makes you sound friendly.
- Stand Up: Standing gives you more energy and better breath control.
- Use Short Sentences: Long sentences get lost in short videos.
- Practice Pronunciation: Clear speech is key, especially for non-native audiences.
Two Non-obvious Insights
- Record at Different Times: Your voice changes throughout the day. Some people sound best in the morning, others at night. Try both and pick your favorite.
- Use Room Tone: Record a few seconds of silence in your recording space. This “room tone” helps fill gaps during editing, making your voiceover sound more natural.
Common Mistakes And How To Avoid Them
Even experienced creators make mistakes. Here’s what to watch for:
- Over-editing: Too many effects or cuts make your voiceover sound robotic.
- Ignoring Platform Restrictions: Some apps limit video length or audio formats. Always check before uploading.
- Using Copyrighted Music: Platforms may remove your video or mute the sound. Stick to royalty-free tracks.
- Poor Sync: If your voice doesn’t match the visuals, viewers get confused.
- Skipping Audio Checks: Always listen to your video before posting.
Example: Avoiding Copyright Issues
TikTok and Instagram often mute videos with copyrighted audio. Always use music from approved libraries. If you’re unsure, check the platform’s guidelines.
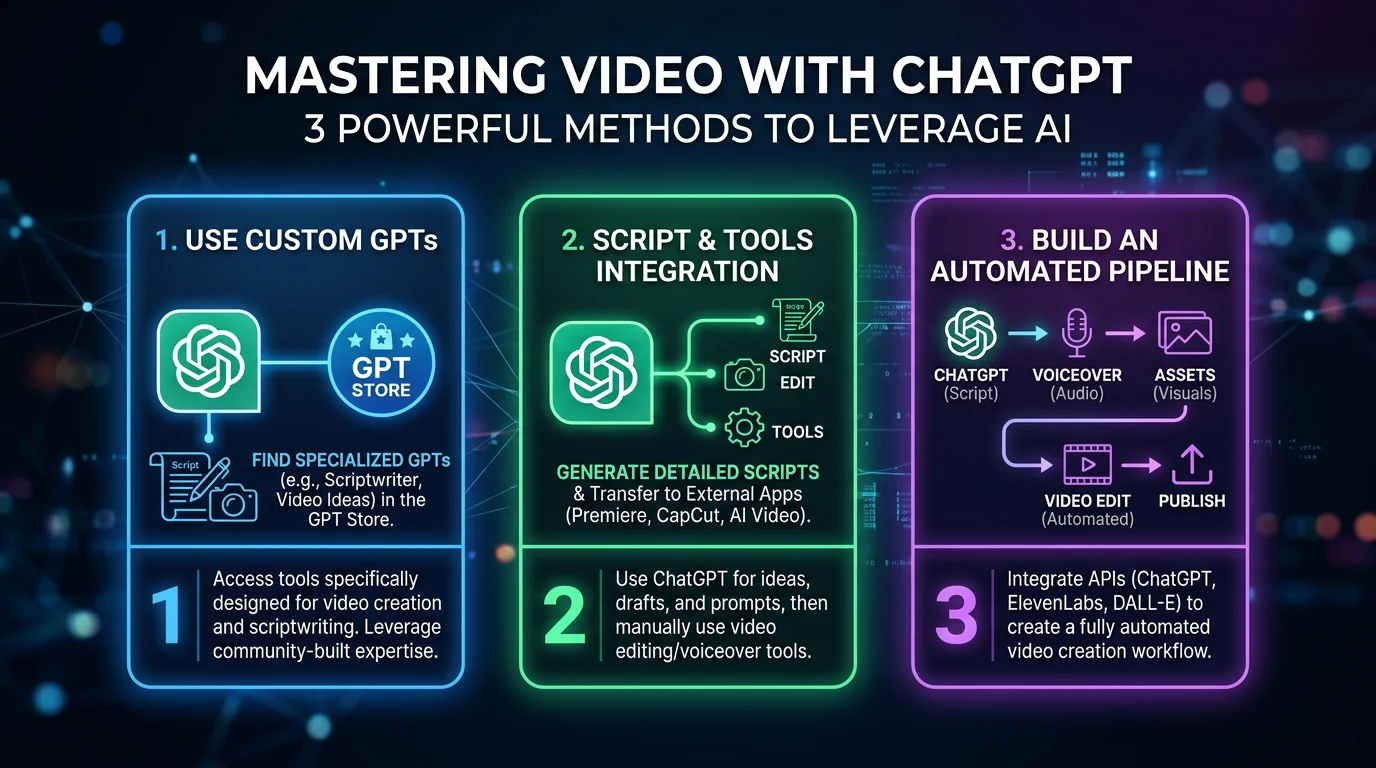
Credit: flowshorts.app
Real-world Examples
Let’s look at how some creators use custom voiceovers in short videos:
- Cooking Tutorials: Chefs explain steps while showing the process. Their voiceover guides viewers and adds personality.
- Product Reviews: Reviewers describe features and give honest opinions. A voiceover builds trust and makes the review clearer.
- Travel Videos: Travelers narrate their experiences, sharing tips and background info.
- DIY Projects: Creators explain tools and steps, helping viewers follow along.
Data Table: Video Types And Engagement
| Video Type | Average Length | Voiceover Usage | Engagement Boost |
|---|---|---|---|
| Cooking | 30–60 sec | High | +40% |
| Product Review | 15–45 sec | Medium | +28% |
| Travel | 20–50 sec | Medium | +22% |
| DIY | 25–60 sec | High | +35% |
The data shows that videos with custom voiceovers get more engagement—especially in cooking and DIY niches.
Accessibility: Making Your Voiceover Inclusive
Many viewers have hearing challenges or speak different languages. Make your voiceover accessible:
- Add Subtitles: Use apps like CapCut or YouTube’s auto-caption feature.
- Speak Clearly: Avoid slang and mumbling.
- Use Simple English: Especially important for global audiences.
According to the World Health Organization, over 5% of the world’s population has hearing loss. Subtitles help everyone enjoy your content.

Credit: www.mindstudio.ai
Testing And Improving Your Voiceover
Don’t stop after your first video. Test, review, and improve.
- Ask for Feedback: Share your video with friends or online groups. Listen to their comments.
- Watch Your Analytics: Platforms show how long people watch your video. If viewers drop off early, your voiceover may need improvement.
- Try Different Styles: Change your tone, speed, or script. See what works best.
Practical Example
You post a cooking video and notice viewers leave after 15 seconds. You try a more energetic voiceover in your next video and see retention rise to 80%. Small changes make a big difference.
Frequently Asked Questions
How Do I Record A Voiceover If I Don’t Have A Microphone?
You can use your smartphone’s built-in mic. Modern phones have good audio quality. Find a quiet room, hold the phone close, and record using apps like Voice Memos (iOS) or Easy Voice Recorder (Android). For even better quality, consider affordable clip-on mics.
What’s The Best Free Software For Editing Voiceovers?
Audacity is a top choice. It’s free, works on Windows and Mac, and offers basic editing, noise removal, and easy exporting. For Mac users, GarageBand is also good. Both are user-friendly and well-supported.
Can I Add Voiceover Directly In Tiktok Or Instagram Reels?
Yes. Both TikTok and Instagram Reels have built-in voiceover tools. After uploading your video, look for the “Voiceover” or “Record” option. Speak your script, adjust volume, and preview before posting.
How Do I Avoid Copyrighted Music Problems?
Use royalty-free music from trusted sources like YouTube Audio Library or Free Music Archive. Always check platform guidelines. TikTok and Instagram offer their own music libraries—use tracks from there to avoid issues. For more details, see YouTube Audio Library.
What’s The Ideal Length For Short Form Video Voiceovers?
Keep your voiceover under 60 seconds. Most short form platforms (TikTok, Instagram Reels, YouTube Shorts) favor videos between 15–60 seconds. Make your script clear and concise. If your message is longer, split it into a series.
Final Thoughts
Adding a custom voiceover to your short form videos gives you control over your message, builds your brand, and boosts engagement. With the right tools, a clear script, and a few insider tips, you can create videos that stand out—even if you’re new to editing.
Remember, practice makes perfect. Test different styles, ask for feedback, and keep improving. Your voice is unique—let it shine in every video you share.


About author








Add comment